Recent Posts
Understanding Hurricane Storm Surges: Risks, Safety, and Precautions
1/9/2024 (Permalink)
 Stay informed, prepared, and vigilant, especially during hurricane seasons.
Hurricanes are natural phenomena that bring forth both the stunning power of nature and the potential for immense destruction. Among the various hazards associated with hurricanes, storm surge stands out as a particularly dangerous and often underestimated threat. In this blog, we'll delve into the complexities of hurricane storm surges, emphasizing the risks, safety measures, and necessary precautions to safeguard you and your property.
What Is a Storm Surge?
A hurricane storm surge refers to a rapid rise in seawater levels caused by a hurricane's strong winds and low atmospheric pressure. It's an abnormal increase in water pushed toward the shoreline, resulting in flooding in coastal and low-lying areas. Storm surges can amplify the destructive impact of hurricanes, causing extensive property damage, erosion, and endangering lives.
Understanding the Risks Associated with Storm Surge
Storm surges can flood coastal regions, often extending several miles inland, causing significant property damage and putting lives at risk. The sheer force of storm surges, combined with powerful waves and currents, can erode beaches, destroy structures, and uproot trees, leading to long-term environmental and infrastructure damage. Storm surges can result in life-threatening situations, with rapidly rising water levels trapping people in their homes or vehicles, making evacuation challenging.
Safety Measures and Precautions
Stay Informed: Keep abreast of weather updates, warnings, and evacuation orders issued by local authorities.
Evacuation Plans: Have a well-thought-out evacuation plan in place, especially if you live in a coastal area prone to storm surges.
Prepare Emergency Kits: Assemble emergency kits containing essentials like water, non-perishable food, medications, flashlights, and important documents.
Secure Property: If possible, secure or reinforce your property before the hurricane arrives by boarding up windows, securing loose objects, and safeguarding important items.
SERVPRO® and Post-Storm Assistance
In the aftermath of a hurricane, SERVPRO of Beaufort County, Hilton Head, Bluffton, Jasper is dedicated to assisting affected communities. Our expert team swiftly responds to storm-related damages, offering restoration services to mitigate the impact on your property. From water extraction to structural drying and debris removal, we work tirelessly to restore your property to its pre-storm condition.
Hurricane storm surges pose significant risks and can lead to devastating consequences. Understanding the dangers they present and taking proactive safety measures are essential to protecting lives and properties. Stay informed, prepared, and vigilant, especially during hurricane seasons.
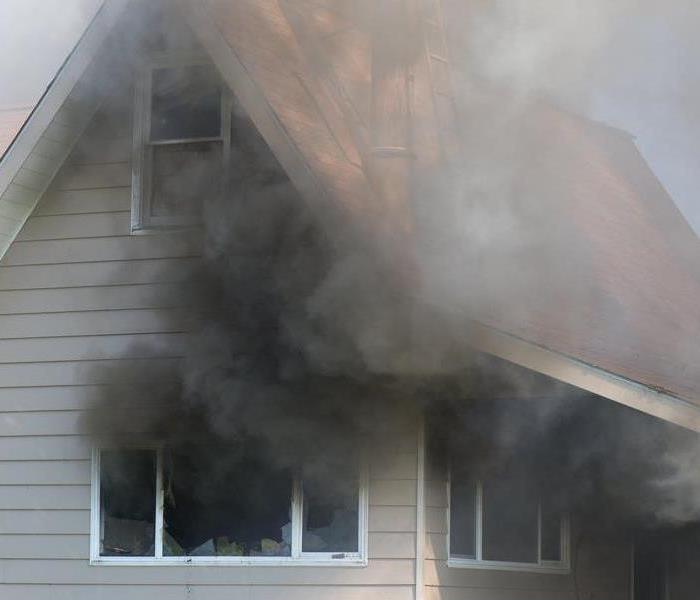
How to Determine the Extent of Fire Damage in Your Home
12/15/2023 (Permalink)
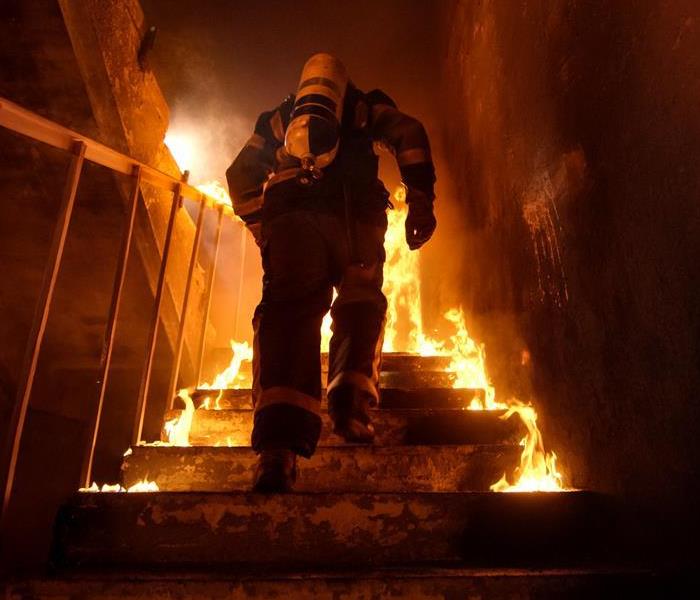
 Assessing the extent of fire damage in your home is the first step toward recovery.
A fire in your home can be a traumatic experience, but knowing how to assess the extent of fire damage is a crucial first step towards recovery. In this blog, we'll guide you through the process of evaluating the damage, helping you understand what to look for and how to plan for effective restoration.
Structural Assessment
Begin by evaluating the structural integrity of your home. Look for signs of damage to walls, ceilings, floors, and the roof. Pay special attention to:
- Sagging or bowing walls and ceilings
- Cracks in the walls or foundation
- Damage to the structural support system
Soot and Smoke Residue
Soot and smoke residue can cause extensive damage, even in areas untouched by the flames. Inspect your home for:
- Soot on walls, ceilings, and surfaces
- Smoke stains and discoloration
- Smoke odors that persist
Water Damage
Firefighters often use water to extinguish fires, which can lead to water damage. Check for:
- Standing water or waterlogged areas
- Mold or mildew growth
- Water-damaged items like furniture and belongings
Electrical and Utility Systems
Examine your home's electrical and utility systems, as they are often affected by fires. Look for:
- Burnt or melted wiring
- Damaged outlets and switches
- Gas leaks or issues with gas lines
Personal Belongings
Assess the condition of your personal belongings, from furniture to clothing, and determine what can be salvaged and what may need to be replaced.
Health Hazards
Recognize the potential health hazards within your home. Fire can release harmful chemicals and particles into the air. Wear appropriate personal protective equipment (PPE) when inspecting your property.
Document Everything
Document the damage with photographs and notes. This documentation will be crucial for insurance claims and working with restoration professionals.
Seek Professional Help
Fire damage assessment can be complex, and it's often best handled by professionals. Contact a certified fire damage restoration company, like SERVPRO® of Beaufort County, Hilton Head, Bluffton, Jasper, to conduct a thorough evaluation. They can provide a comprehensive assessment and develop a customized restoration plan.
Assessing the extent of fire damage in your home is the first step toward recovery. It's a critical process that should not be rushed, as overlooking any damage can have long-term consequences. Safety should always be your top priority. If you've experienced a fire, know that you're not alone. Our SERVPRO® team is here to help with the assessment, cleanup, and restoration of your home. Our goal is to restore your property to its pre-fire condition, ensuring your peace of mind during this challenging time. Don't hesitate to reach out for assistance and expert guidance.
How Long Does Mold Remediation Take?
10/19/2023 (Permalink)
 The duration of mold remediation in your home varies depending on several factors, including the extent of mold growth.
Dealing with mold issues in your home can be a concern, and understanding the timeline for mold removal and remediation is essential for planning and peace of mind. In this blog, we'll explore the factors that influence the duration of mold removal and remediation in your Bluffton, SC home. By having realistic expectations, you can navigate the process smoothly and efficiently.
Assessment and Inspection
The initial step in mold removal is a thorough assessment and inspection by professionals. This process typically takes a day or two, depending on the size and complexity of your property. During this phase, experts identify the extent of mold growth, the type of mold present, and the underlying causes of the issue. This information guides the remediation plan.
Remediation Plan Development
Once the assessment is complete, mold removal professionals develop a remediation plan tailored to your specific situation. This step can take a few days as it involves careful planning and consideration of the most effective methods. Factors like the type of mold, affected areas, and the presence of any structural damage influence the duration of this phase.
Containment and Setup
Before the actual mold removal begins, the work area needs to be carefully contained to prevent the spread of mold spores to unaffected parts of your home. Setting up containment can take a day. Professionals will also establish safety measures and protective barriers during this phase.
Mold Removal
The mold removal process itself varies in duration depending on the extent of the infestation. Small-scale projects may take a few days, while larger ones can span several weeks. Experts use specialized equipment and techniques to safely remove and dispose of mold-infested materials. The goal is to eliminate the mold completely.
Drying and Restoration
After mold removal, the affected areas need to be thoroughly dried to prevent future mold growth. This can take a few days to a week, depending on the extent of moisture damage. The timeline for restoration, which includes repairing or replacing damaged materials, depends on the scope of work. It may range from a few days to several weeks.
Final Inspection and Clearance
Once the mold removal and restoration work is complete, a final inspection is conducted to ensure that all mold has been successfully eliminated. Clearance testing may also be performed to confirm that the indoor air quality is safe. This typically takes a day or two.
The duration of mold removal and remediation in your Bluffton, SC home varies depending on several factors, including the extent of mold growth and the complexity of the project. While some small-scale projects may take a few days, larger and more complex cases can extend over several weeks. It's essential to work with experienced professionals who can provide a realistic timeline and guide you through the process. If you suspect mold issues in your home, don't hesitate to contact our SERVPRO® Beaufort County, Hilton Head, Bluffton, Jasper experts for a thorough assessment and efficient mold remediation services. Stay informed and take proactive steps to keep your home mold-free and comfortable!
How Thermal Imaging Uncovers Hidden Water Damage
10/14/2023 (Permalink)
 Thermal imaging plays a pivotal role in early detection.
Water damage can be a silent intruder, hiding behind walls, ceilings, and floors until it becomes a costly and extensive problem. In Bluffton, SC, where humid subtropical weather prevails, detecting hidden water damage is crucial for homeowners. In this blog, we'll explore the significant role of thermal imaging in identifying concealed water damage and why it's an essential tool for protecting your Bluffton property.
Understanding Hidden Water Damage
In Bluffton's climate, high humidity and frequent storms can lead to water intrusion, which often goes unnoticed until it's too late. Hidden water damage can weaken structures and promote mold growth, posing health and safety risks.
How Thermal Imaging Works
Thermal imaging, also known as infrared thermography, is a non-invasive technology that detects temperature differences. It can identify areas of moisture or water damage by capturing the temperature variations caused by evaporation.
Early Detection Saves Costs
Detecting water damage in its early stages can save you from costly repairs. Thermal imaging allows professionals to identify problem areas before visible signs, such as stains or mold, appear.
Preventing Mold Growth
In Bluffton's humid conditions, hidden water damage can quickly lead to mold growth. Thermal imaging helps locate moisture sources so that they can be addressed promptly, preventing mold infestations.
Reducing Structural Damage
Identifying concealed water damage early can help prevent structural deterioration. It allows for timely repairs to restore your property's integrity.
Energy Efficiency
Water damage can compromise insulation and affect energy efficiency. Thermal imaging can help pinpoint areas where insulation is compromised, allowing for targeted repairs to improve energy efficiency.
Non-Invasive Inspection
One of the advantages of thermal imaging is its non-invasive nature. It doesn't require poking holes in walls or ceilings to detect water damage, minimizing disruption during inspections.
Professional Expertise
While thermal imaging equipment is effective, it requires trained professionals to interpret the data accurately. Consider hiring certified experts like SERVPRO® perform thorough inspections.
Routine Maintenance
Regular thermal imaging inspections, especially before and after storm seasons, can help you catch potential water damage issues early, saving you money and stress.
Thermal imaging plays a pivotal role in early detection. By identifying hidden water damage before it becomes a major issue, you can protect your property, reduce repair costs, and maintain a safe and healthy living environment. For comprehensive thermal imaging inspections and water damage restoration in Bluffton, contact SERVPRO®. Our team of experts is equipped with the latest technology to safeguard your home.
Expert Tips to Keeping Your Property Dry in Storm-Prone South Carolina
9/26/2023 (Permalink)
Living in storm-prone South Carolina demands a proactive approach to flood prevention. The state's coastal location and varied climate can lead to heavy rainfall and hurricanes, making flood protection essential for homeowners and property owners. In this blog, we'll guide you through effective flood prevention strategies tailored to South Carolina, helping you safeguard your property and prepare for potential flooding.
Understanding South Carolina's Flood Risk
South Carolina's geographical diversity and coastal proximity expose it to a range of flood risks, from heavy rains to storm surges. As a property owner, it's crucial to be prepared for these challenges and implement measures to prevent flood damage.
Maintain Gutters and Downspouts
Clear, well-maintained gutters and downspouts are your first line of defense against flooding. Regularly remove debris to ensure proper water flow and direct rainwater away from your foundation. Installing gutter extensions can further help prevent water accumulation around your property.
Elevate Outdoor Equipment
Elevate outdoor HVAC units, generators, and other equipment above potential flood levels. This prevents water damage to these systems and reduces the risk of electrical hazards during flooding.
Install French Drains
French drains are effective at diverting excess water away from your property. Consult a professional to determine the appropriate placement and design for your property's specific needs.
Grade Your Landscape
Ensure your property's landscape is properly graded to direct water away from your foundation. Implementing proper grading can significantly reduce the risk of water pooling near your home.
Use Flood Barriers and Sandbags
In anticipation of heavy rainfall or storm warnings, deploy flood barriers and sandbags around vulnerable areas of your property, such as doors and windows. These temporary measures can help redirect water away from your home.
Elevate Living Spaces
If you're building or renovating, consider elevating living spaces above potential flood levels. Elevating structures reduces the risk of flood damage and minimizes the impact of rising water levels.
Invest in Flood Insurance
Given South Carolina's susceptibility to flooding, investing in flood insurance is a smart choice. Standard homeowner's insurance policies typically do not cover flood damage, so having flood insurance provides additional protection for your property.
Consult Experts
Engage with professionals who specialize in flood prevention, such as landscape architects, waterproofing contractors, and structural engineers. Their expertise can guide you in making informed decisions tailored to your property's characteristics.
Preventing flooding in storm-prone South Carolina requires proactive planning and a commitment to flood prevention strategies. From maintaining gutters and elevating outdoor equipment to installing French drains, grading your landscape, using flood barriers, elevating living spaces, investing in flood insurance, and seeking expert advice, these measures are essential for safeguarding your property. By taking these steps, you're not only protecting your investment but also ensuring the safety and well-being of your family or tenants during times of inclement weather.
The Importance of Regular Home Maintenance: Tips and Tricks for Keeping Your House in Top Shape
8/8/2023 (Permalink)
 Safety first to protect yourself and others from a natural gas leak.
Natural gas is a valuable source of energy in many households, but it's important to know what to do if you detect a gas leak. Natural gas is odorless, but gas companies add a distinct odorant called mercaptan to help people identify leaks by scent. If you ever smell this rotten egg-like odor, it is crucial to take immediate action to ensure your safety and the safety of those around you. In this blog post, we will provide you with a step-by-step guide on what to do if you smell natural gas.
Recognize the Signs
The strong odor of natural gas is the primary indication of a gas leak. If you detect this smell, it's important not to ignore it or assume it will go away on its own. Take it seriously and act promptly.
Avoid open flames and electrical devices. Gas leaks can ignite easily, so immediately extinguish any open flames, including candles, matches, or cigarettes. Avoid using electrical devices, as even a small spark can trigger a fire or explosion.
Open Windows and Doors
Create ventilation by opening windows and doors in the affected area. This helps to disperse the gas and reduce the concentration of natural gas in the air.
Evacuate the area if the gas odor is strong or you feel dizzy, lightheaded, or experience difficulty breathing, evacuate the premises immediately. Alert everyone in your household and anyone nearby to leave the area as well. Do not use any electrical devices or operate any switches or appliances as you exit.
Stay Away and Do Not Use Phones
Once outside, move to a safe location away from the source of the gas leak. Do not use your cell phone or landline phone in the vicinity of the leak, as a spark from the phone could ignite the gas.
Contact your gas utility company or the local emergency services from a safe location. Provide them with your name, address, and a detailed description of the gas smell and any related symptoms you or others may have experienced. Follow their instructions and do not return to the area until it is deemed safe to do so.
Avoid Potential Ignition Sources
While waiting for emergency personnel to arrive, do not attempt to turn off gas valves or appliances yourself. Avoid turning on or off any electrical switches or using any devices that could produce a spark, as these actions can cause a gas ignition.
If anyone has been exposed to natural gas for a prolonged period or is experiencing severe symptoms, seek medical attention immediately.
Allow Professionals to Assess and Repair
Gas leaks should only be handled by professionals trained in gas line repairs and maintenance. Once emergency personnel arrive, allow them to assess the situation and carry out any necessary repairs or adjustments safely.
After a gas leak incident, it is essential to schedule a professional gas inspection to ensure there are no further issues with your gas lines or appliances. Regular inspections can help prevent future leaks and ensure the continued safety of your home.
Remember, safety is paramount when it comes to natural gas leaks. Always trust your senses and act promptly if you smell gas. By following these steps and seeking assistance from professionals, you can minimize the risks associated with gas leaks and protect yourself and your loved ones from potential dangers. Stay informed, be prepared, and prioritize your safety when it comes to natural gas.
5 Simple and Effective Ways to Get Rid of Mold Odor
5/11/2023 (Permalink)
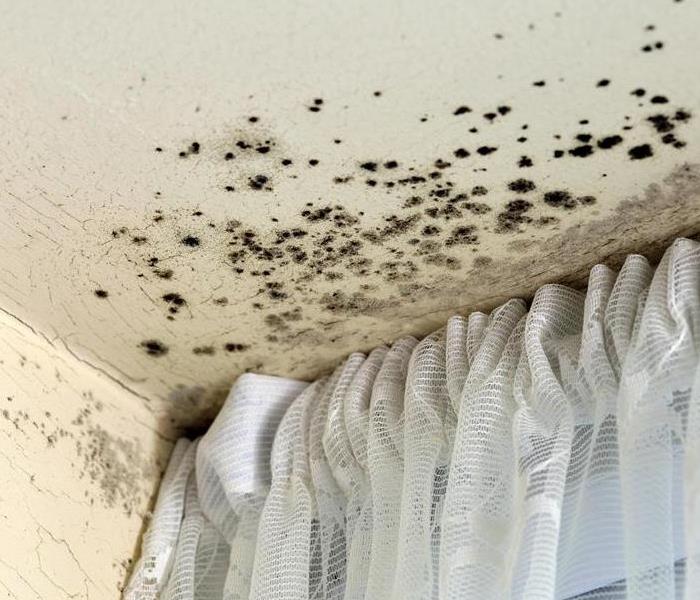 Mold odor requires proper steps to eliminating the problem and ensuring home is comfortable and safe.
Mold odor can be persistent and unpleasant, even after the mold itself has been removed. Fortunately, there are effective ways to get rid of mold odor. One method is to use an air purifier or dehumidifier to circulate clean, dry air and remove moisture from the environment. Using an odor-eliminating spray or essential oils can help to mask the mold odor. It's important to note that these methods are only effective after the mold itself has been removed and the underlying cause of the mold growth has been addressed. If you're experiencing persistent mold odor, it's best to consult with a professional mold remediation company to ensure that the underlying issue is properly addressed and resolved.
The odor can linger even after you've removed the mold, making your home feel uncomfortable and uninviting. However, with the right techniques, it's possible to eliminate mold odor and make your home smell fresh and clean again.
Identify the Source of the Mold Odor
The first step in getting rid of mold odor is to locate the source of the smell. Mold often grows in damp and dark places such as basements, bathrooms, and kitchens. Check these areas for signs of mold growth and moisture, including discoloration, water stains, and musty smells. Once you've identified the source of the mold, you can take steps to eliminate it.
Clean the Affected Area
The next step is to clean the affected area thoroughly. Use a solution of water and white vinegar to clean the surface, and then use a HEPA vacuum to remove any mold spores that may be present. Make sure to wear gloves and a mask to protect yourself from mold exposure.
Use Baking Soda
Baking soda is a natural deodorizer that can help absorb moisture and eliminate mold odor. Sprinkle baking soda over the affected area, and let it sit for a few hours or overnight. Then, vacuum up the baking soda with a HEPA vacuum.
Use Activated Charcoal
Activated charcoal is another natural deodorizer that can help eliminate mold odor. Place small bowls of activated charcoal in the affected area, and let them sit for a few days. The charcoal will absorb moisture and odors, leaving your home smelling fresh and clean.
Increase Ventilation
Finally, increasing ventilation in your home can help prevent mold growth and eliminate mold odor. Open windows and doors to allow fresh air to circulate, and use fans or dehumidifiers to reduce humidity levels. This will help keep your home dry and prevent mold growth in the future.
In conclusion, getting rid of mold odor requires a multi-step approach that includes identifying the source of the mold, cleaning the affected area, using natural deodorizers, and increasing ventilation. With these simple techniques, you can eliminate mold odor and make your home a comfortable and inviting place to be.
Soot Webs: What Are They and How to Get Rid of Them?
4/10/2023 (Permalink)
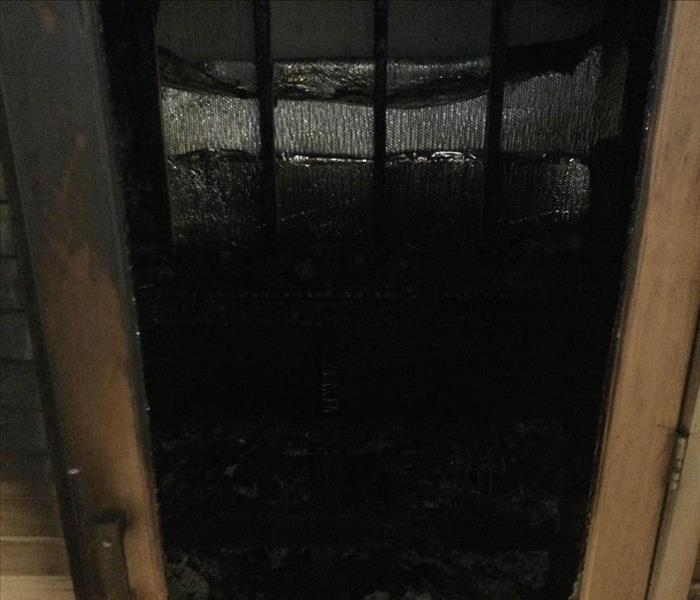
 Soot webs, give SERVPRO a call for your fire damage property.
Have you ever noticed a black, cobweb-like substance accumulating around the ceilings, walls, and corners of your home? This is known as soot webs, and they can be a nuisance to clean up. Soot webs are not only unattractive, but they can also be a sign of a more significant problem with your home's heating system. In this blog post, we will discuss what soot webs are, what causes them, and how to prevent them from forming.
Soot webs are not actual cobwebs, but rather they are a collection of fine black particles that have accumulated due to incomplete combustion of fossil fuels such as oil, gas, or wood. These particles are tiny, measuring less than 1 micron in diameter, and are invisible to the naked eye. When they accumulate in large enough quantities, they can create the appearance of a cobweb.
Inefficient Heating
One of the main causes of soot web formation is an inefficient heating system. When fossil fuels are burned, they release a variety of byproducts, including water vapor, carbon dioxide, and particulate matter. Incomplete combustion can result in the release of soot, which can then accumulate on surfaces throughout your home.
Other factors that can contribute to soot web formation include a dirty furnace or boiler, a clogged chimney, and poor ventilation. When your heating system is not functioning properly, it can lead to incomplete combustion of fossil fuels, which in turn can lead to the formation of soot webs.
Underlying Issue
If you notice soot webs in your home, it is important to address the underlying issue promptly. Ignoring the problem can result in more severe issues, including a potential fire hazard. To prevent the formation of soot webs, regular maintenance of your heating system is crucial. This includes regular cleaning of your furnace or boiler, as well as regular chimney cleaning.
Improve Ventilation
You can also take steps to improve the ventilation in your home. This includes opening windows and doors to allow fresh air to circulate and using exhaust fans in areas where moisture is prevalent, such as the bathroom and kitchen.
It is also important to ensure that you are using the correct type of fuel for your heating system. Using a fuel that is not recommended for your particular system can result in incomplete combustion and the formation of soot.
In conclusion, soot webs are a common issue that can be caused by an inefficient heating system, poor ventilation, and the use of incorrect fuel. Regular maintenance of your heating system and proper ventilation can help prevent the formation of soot webs in your home. If you do notice soot webs, it is important to address the underlying issue promptly to prevent any potential fire hazards.
Prepare your home for Spring
3/16/2023 (Permalink)
 Prepare for Spring, spring cleaning to get rid of the old.
Spring cleaning can be a daunting task. However, if you prepare your home for the season before it gets too warm, you'll save yourself from an overwhelming mess.
Clean windows, doors and frames
Clean windows, doors and frames. Vinegar and water are an effective combination for cleaning glass surfaces. Mix one part vinegar with three parts water in a spray bottle, then use the mixture to clean your windows. Use a squeegee to remove excess water from the window and dry it with a soft cloth when you're finished cleaning it. If you want to do touch-ups after this initial cleaning process, try using rubbing alcohol instead of vinegar; it works just as well but smells better!
Clean window screens (if applicable). Screens should be removed from their frames whenever possible so that they can be thoroughly cleaned without damaging any part of your home's interior design aesthetic.
Wash your floor
Washing your floors is a great way to prepare for spring. While you're at it, give them a good scrubbing with hot water and soap (you can use dish detergent). Then wipe them down with a dry cloth in case there are any streaks left behind by the cleaning solution.
If you need more help getting rid of tough spots or stains, consider using vinegar and baking soda instead of harsh chemicals like bleach or ammonia. They're both effective at removing dirt without damaging your hardwood floors' finish.
Remove winter coats and heavy blankets from the room
Remove winter coats and heavy blankets from the room. If you have a closet or storage space that is large enough to store your winter clothing, then it's best to put them away there. However, if your house does not have enough space for this, then consider buying some extra shelves for your bedroom wall.
You could also use an old dresser drawer or chest of drawers as an additional storage place for these items during the warmer months when they aren't needed anymore. Make sure that whatever container you choose has enough room inside so that everything fits comfortably without being crammed together tightly (this will save wear-and-tear on your belongings).
Dust ceiling fans, vents, light switch covers and door knobs.
Use a duster to remove dust from ceiling fans, vents and light switch covers. You can also use a vacuum cleaner with an upholstery brush attachment on the hose attachment to clean off fan blades and other hard-to-reach areas. If that doesn't work well enough for you, dampen a rag with water or vinegar to help cut through some of the grease buildup and wipe down those surfaces until they look clean again.
Spring cleaning is a great way to get your home ready for the warm weather. It's also a great way to get rid of clutter, so you can start the year fresh and enjoy the outdoors without being bothered by clutter.
Spring cleaning isn't just about getting rid of old items, it's also about making sure everything in your home works properly. If something needs repair or replacement, now's the time to do it before summer rolls around again!
If you want to enjoy the spring, it's time to do some cleaning. This will not only make your home look good, but also allow you to breathe fresh air and feel more relaxed.
What is the Water Damage Restoration Process?
2/17/2023 (Permalink)
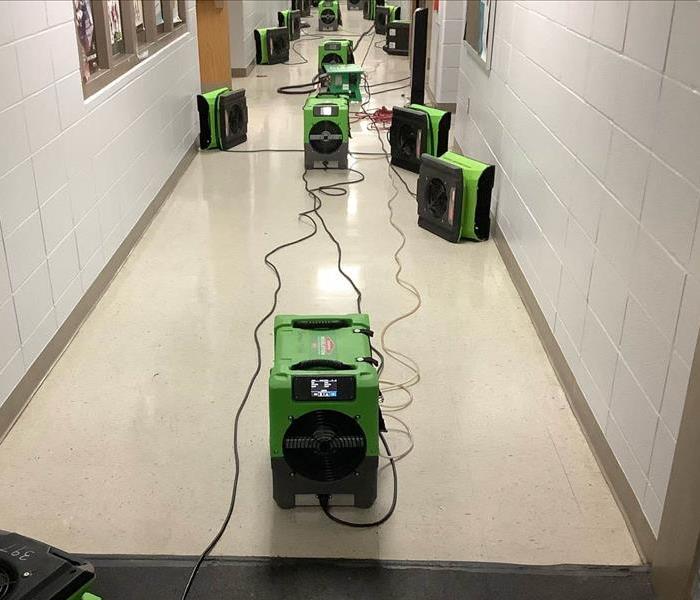
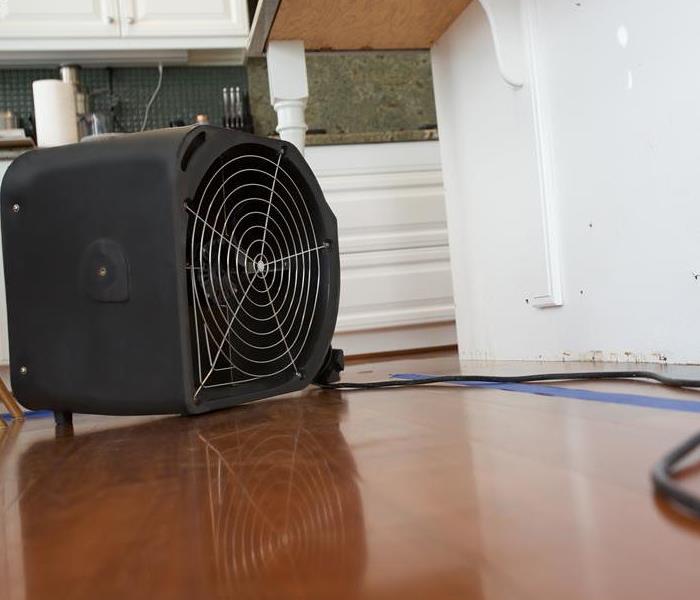 Air movers are used to help restore your property after a water damage.
Water damage restoration is a complicated process that requires expertise, experience and teamwork. The water damage restoration process is organized into three stages, water removal, drying, cleaning and disinfecting. Each stage is important to the overall success of your project. It’s not something that can be completed in a single visit, or even over the course of several days or weeks. It’s a long process that requires expertise, tools and equipment to complete correctly.
Water Removal
This is where you get rid of any wet or soaked materials that have been exposed to water. Content of the property should be removed and disposed of properly. The property can also be begin the drying process using fans and dehumidifiers where necessary. They may use dry ice to help keep the room cooled down to help prevent secondary damages.
Your water damage experts will first be dispatched to your location to pump or suction standing water from the building. Once they’ve removed as much of this moisture as possible, they will begin addressing any issues caused by high humidity levels in your home or office space—often by installing dehumidifiers and fans throughout affected areas to move air more quickly through these spaces and reduce unwanted moisture buildup on surfaces such as wood floors, drywall, cabinets and appliances (like refrigerators).
Drying
Air movers, dehumidifiers, heaters, and sometimes moisture meters are put in place to help expedite the drying process. Moisture meters are used to help measure the amount of moisture in the property and damage to put together a plan of action for water removal.
The use of equipment such as truck-mounted vacuum and industrial pumps enables SERVPRO to remove large amounts of water quickly, efficiently and safely. The truck-mounted vacuum is used for large areas where there is little access or where it’s impractical to transport heavy equipment in by hand.
Cleaning
The final step is cleaning and disinfecting surfaces to remove contaminants from the area. This step is usually done by a professional, but if you're feeling up to it, you can also do it yourself. The cleaning process is done with a combination of chemicals and vacuuming. After this final step, you will be able to move back into your home again! You may still need to take care of items that were warped or damaged by flooding water, but at least now it's safe for you and your family members to live without interruption.
When water damage is present in your home, don't wait! Give the professionals a call at SERVPRO a call for your water damage restoration emergency.


 24/7 Emergency Service